While spending some time with family a couple weeks ago my cousin asked me about foundation. She said she doesn't like to wear foundation but every now and then will use concealer to cover up scars, blemishes, dark circles, freckles, etc. We just got to talking about foundation and its importance so I thought I would do a post about it!
Alot of times we think foundation just feels cakey and cloggy and yuck! But it doesn't have to be that way! There are 3 different types of coverage. Sheer coverage, medium coverage and full coverage. There are also different types of foundation; powder foundation, cream foundation, and liquid foundation.
So, lets talk about WHY we would even wear foundation in the first place. To me, the whole reason to wear foundation is to even out your skin tone and add some radiance to your complexion. A lot of women have red parts in their skin, around their nose, around the corners of their mouths, maybe even on the cheeks and forehead. So the skin then appears blotchy. Foundation will help even that out! Another thing is the correct foundation can make blemishes look less noticeable and it can make you look younger. Now just because I am saying that these are the reasons for foundation does not necessarily mean you are going to go cake on a thick layer of goop. Foundation is there to enhance and compliment your appearance, not change it. Do we understand the difference? =)
So what kind of foundation and coverage does your skin need then?
Sheer Coverage: If you are blessed with a clear and smooth complexion go for the sheer coverage! It will feel very light and give you subtle coverage. Sheer coverage foundations come in liquid, powder compact or a tinted moisturizer.
Liquid is the greatest foundation to get for all skin types, you can either get an oil-free formula for oily skin or a moisturizing formula for dry skin.

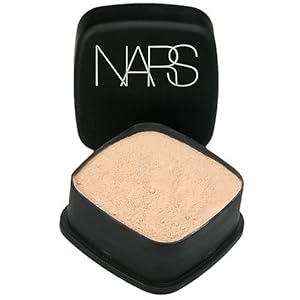
This is NARS Sheer Glow Foundation $42 at Sephora good for Dry skin
or you can find the NARS Sheer Matte Foundation for Oily skin at Sephora as well.
or

This foundation can be a very light coverage but is build able to create a more fuller coverage, so great!
Powder Compact is a dual finish powder foundation that gives you a quick sheer coverage. Just apply with a brush and your set to go! Super easy and great for touch ups on the go. What's great about powder foundation is you can also use a wet sponge to apply for more coverage if you ever needed to.

This is the Laura Mercier Foundation Powder $40 at Sephora
Then there is a Tinted Moisturizer, which is by far the sheerest of all sheer foundations. What it is is actually what it sounds like, a moisturizer with a little color added to make a tint. This is perfect to use during the summertime when your at the beach or lake and you don't want to wear much makeup. It definitely evens out the skin but at the same time provides very light coverage. Plus, a lot of moisturizer's have sunscreen in them so this is great in protecting your skin from the sun!

This is Urban Decay's Urban Defense Tinted Moisturizer SPF20 $30 at Sephora
or

The Smashbox Sheer Focus Tinted Moisturizer SPF 15 $30 at sephora
Medium and Full Coverage: Medium to full coverage have thicker consistencies. You're going to want to use this type of foundation for concealing breakouts, scars, and even for just wanting a longer lasting fuller coverage. Types of medium and full coverage foundation are creme, stick, creme-to-powder and mineral powder.

This is Clinique's City Base Compact Foundation $24 at Sephora

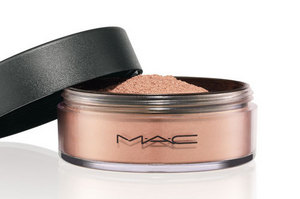
Bare Minerals Foundation $26 at sephora
Cream is a foundation that is very smooth and creamy. It can be great for dry skin, however, you want to make sure you don't do too heavy of an application otherwise it will make your face look "cakey". I love to use a sponge for cream foundations and instead of a swiping motion I do more of a stippling motion. Also, the great thing about cream foundation is you can mix in a little bit of regular moisturizer to the cream to create a more sheer coverage. Cream really can be used as all three coverage's!Another thing that is great is you can always use the cream foundation as a concealer. It's so versatile!

This is Cover FX Total Coverage Cream Foundation $42 at Sephora
Stick foundation basically is very similar to cream foundation, its more of a cream foundation and concealer in one. This is probably the best type of foundation for someone who wants the fullest coverage there is. It is ideal for normal to dry skin and someone who needs the coverage. On someone with clear skin it might look too heavy and cakey.

This is Bobbi Brown Foundation Stick $41 at Sephora
These are all just examples and I am sure there are a ton of other brands that work just as well! These are just a few that I really like. If you are wondering what color of foundation to get check out my other blog post here about how to find the correct color of foundation!
Hope you enjoyed! Thanks for reading!!
Have a great day =)
Leah